Equipment:
Pizza Stone or baking sheet
Peel
Cutting Board
Good knife
Ingredients:
1 Cup of cooked chicken
Pesto Sauce- I use Buitoni when I don't have fresh basil to make my own.
Sweet and Tangy BBQ Sauce
2 tsp red pepper flakes
1 cup cooked spinach
3 pieces cooked bacon
2 cups Tillamok Mozzarella Cheese
1/2 of a red onion sliced thin
Procedure:
1. Roll out pizza dough and place on hot baking stone.
2. Cook dough for about 15 minutes at 400 degrees.
3. Remove from oven and spread pesto sauce on the crust.
4. Sprinkle sliced onions, cooked chicken, spinach, red pepper flakes, and bacon pieces all over crust.
5. Dollop BBQ sauce all over pizza
6. Sprinkle cheese over the top.
7. Bake in a 350 oven until cheese is bubbly.
8. Remove from oven and let cool for 5-10 minutes.
Enjoy!
Friday, February 24, 2012


Pizza Dough
Homemade Pizza Dough is fantastic and very easy to make especially if you have an electric stand mixer. If not, you can still work this dough by hand and develop some very nice biceps. If I am going to take the time to make the dough, I like to quadruple the recipe and bake up several pizza shells to freeze for later. Simply par-bake the shells as the instructions indicate below and then wrap the cooled pizza crusts in plastic wrap and place in the freezer. You can even make up pizza kits and add some pizza sauce and toppings to your crusts so the kids can easily grab them on nights where time is running short. I don't recommend freezing the pizzas already made up because the toppings all thaw at different rates and don't bake up the same as store bought frozen pizzas. It doesn't take too long for the kits to thaw so they can be assembled and baked. I like to heat my sauce up on the stove over medium/low heat to help it along.
Ingredients:
1 package yeast-2 1/4 tsp
1 cup warm water
1 tsp salt
1/2 tsp sugar
3 T Olive Oil
3-3 1/2 C Unbleached All-purpose flour
Cornmeal
Procedure:
1. Combine the yeast with 1 cup of flour and 1/2 tsp sugar in the mixer fitted with the dough hook.
2. Add 1 cup water and combine.
3. Let it sit for about 5 minutes to allow the yeast to activate and begin growing.
4. Add 2 T oil and the salt and mix.
5. Add the remaining flour 1 cup at a time. Do not add too much flour. This dough should be smooth and elastic but not sticky. The dough will be very stiff but you don't want it to be dry.
6. Knead in the mixer or by hand until the dough is smooth and can be made into a ball.
7. With the remaining 1 T of oil, rub it inside a bowl large enough for the dough to double in size.
8. Place the dough in the bowl and then turn the dough over once in the oiled bowl to coat the dough with oil. Cover with plastic wrap. You don't want to let this dough dry out.
9. Let rise till double in bulk.
10. Punch down and knead on the counter for 2 minutes to incorporate the oil on the dough. Then divide it in half to roll it out for 2 pizzas. You can also shape the dough into a loaf of french bread.
11. Sprinkle cornmeal on the baking sheet and place the rolled out dough onto it. The cornmeal helps the dough to not stick to the pan during baking. Brush olive oil onto the surface of the dough and poke holes with a fork in the dough to prevent large bubbles from forming during baking.
*12. Bake the pizza crust at 450 degrees for about 8 minutes then remove it from the oven and put the pizza sauce and toppings on the pizza. Watch the crust during this baking time and if large bubbles form poke them during the cooking time with your fork so the crust bakes flat and even.
13. After you have topped your pizza, bake until cheese is bubbly. This only takes about 10 minutes depending on your oven. Watch the cooking time to make sure the cheese doesn't burn and also to determine what the cooking time should be for your oven.
*Commercial pizza ovens heat up to 550 degrees and that is why you get that crispy crust with oozing, yummy cheese on the top. To achieve this at home I have found that par-baking the crust helps to get that nice crisp crust with the gooey toppings.
Sunday, January 22, 2012
Bruschetta
This simple yet amazing appetizer is worthy of any dinner table. The bread should be crisp and hot and the tomatoes and basil fresh and sweet.
Equipment:
8 inch skillet-non-stick, stainless, or cast iron
Tongs
Small Bowl
Strainer that will fit over bowl
Large spoon from your everyday eating set
A sharp knife
Cutting Board
Ingredients:
1 Loaf of good crusty bread; sliced 1/2 thick-French, Italian, Baguette, Sourdough
Fresh tomatoes of the small variety and color. The more varied the color the more appetizing your food will look.
1 large clove of garlic
1 bunch of fresh basil
1/4 Cup olive Oil-plus more for the skillet
2-3 T of unsalted butter
1/2 tsp of kosher salt
pinch of ground black pepper
Balsamic Vinegar-optional
Procedure:
1. Dice the tomatoes into chunks and place them in the bowl and sprinkle the salt over them.
2. Finely ribbon the basil by laying the leaves on top of one another (stacking) then rolling the leaves up into a tube. Finely cut the basil then toss in the bowl with the tomatoes.
3. Add the olive oil to the bowl.
4. Take 1/2 of the clove of garlic and mince it and add it to the tomato mixture.
5. Toss the tomatoes, basil, salt, and garlic in the olive oil and set it aside for 10 minutes. The salt will help draw some of the water out of the tomatoes as they marinate.
6. Slice the bread at an angle about 1/2 thick.
7. In a medium hot skillet, add 1 T of olive oil. Allow it to heat up then add 1 T of butter. The oil helps the butter to not burn. Make sure the skillet is good and hot before adding the bread. You want the bread to toast and get crispy, not just soak up the oil.
8. Toast your bread in the skillet till each side is a crispy brown.
9. While the bread is toasting. Take the strainer and pour the tomato mixture into it to strain off the excess juices. Save the strained juice to add to spaghetti sauce if you like.
10. With the other 1/2 of the garlic, rub it on one side of the hot, toasty bread.
11. Spoon two spoonfuls of the tomato mixture onto the garlic side of the toasted bread and serve hot.
For an added boost of flavor-sprinkle a tiny amount of really good balsamic vinegar over the top before serving.
Enjoy!
This is great to have before a meal of spaghetti and meatballs. It is also a great appetizer for a party or add a nice salad for a yummy lunch!
Monday, January 16, 2012
Rich and Creamy Alfredo
Alfredo Sauce is extremely easy to create. It is a rich white sauce that should be buttery and creamy, with the tang of Parmesan Cheese and the zip of garlic. I have had some Alfredo that tastes like paste and others that are rich and creamy.
This recipe goes together so fast, make sure all of your ingredients are prepped and ready to go before starting.
Equipment:
8 inch non-stick skillet
Silicone coated whisk
Ingredients:
4 oz Cream Cheese
1/2 Cup Cold butter
1/2 Clove of Garlic, minced
1/2 tsp pepper
1/2 Cup grated Parmesan Cheese
1 Cup Whole Milk or Heavy Cream
Freshly Grated Nutmeg; about 1/8 of a teaspoon
Fresh chopped Parsley
Procedure:
1. Beginning in a cold skillet, place the butter and the cream cheese and heat to medium. Whisk together until combined. It will look like tiny curdles of milk; 1 to 2 minutes.
2. Add the minced garlic just as the butter and cream cheese mixture is coming together and whisk for a few seconds to release the oils in the garlic.
3. Add the heavy cream or milk and whisk until a creamy bubbly sauce forms.
4. Turn down the heat to low and add the Parmesan Cheese and whisk until combined and melted into the sauce.
5. Add the pepper and grate the nutmeg over the top of the sauce then stir into sauce off the heat.
6. Cooked Fettuccini noodles and drain. Toss with final tablespoon of butter and then pour finished sauce over the top for family style. Garnish with some fresh chopped parsley.
Mamma Valentine's Spaghetti Sauce
Spaghetti Sauce is one of those staples every kitchen should have. It is one of the most versatile sauces I can think of and so easy to make you will never buy commercially made sauce again!
I had to spend a bit more time working out the measurements for this recipe, because I don't measure. It is all eyeballed. The more you make this sauce, the less you will have to measure. This is one of the few recipes I will open a can for. If you make your own basic tomato sauce then use that but I find the S&W Brand Organic Tomato Sauce to be very good and works well with this recipe. If you are going to the trouble to make your own sauce, then use the best ingredients you can.
All of the herbs I add are at a measurement based on the strength of their flavor. If there is an herb you prefer above others than adjust to your liking. I find I like the Rosemary and Thyme flavors under the Oregano and Basil. I also like Marjoram very much but don't usually have it on hand so that is one that comes and goes in my sauce. Have fun with it and work out what your favorite flavors are.
Equipment:
Mortar and Pestle
8 Qt Stock Pot with lid-Dutch oven style is best
Long wooden spoon
Good cutting knife
Garlic Press if you don't want to mince your own garlic
Ingredients:
4 15oz cans of Organic Tomato Sauce-Why organic? Why not?
1 finely diced small white or yellow onion
4 cloves of garlic minced
1/4 Cup Olive Oil
1/4 Cup Dried Parsley
2 T Dried Basil
2 T Dried Oregano
1 T Dried Thyme
1 T Dried Marjoram
1/2 T Dried Rosemary
1 tsp Ground Savory
1 tsp Kosher Salt and Pepper to taste
Procedure:
1. Finely Dice the onion. Open all of the cans of tomato sauce and set out ready to add to the pot.
2. Mince the garlic and place in a small prep bowl.
3. Measure all of the dried ingredients into the mortar and grind till fragrant and medium fine. Set aside.
4. Heat the oil in the bottom of the stock pot and add the onions and 1 tsp of kosher salt. Cook on medium to medium low heat. You do not want the onions to caramelize. They should cook till opaque; about 4-5 minutes
5. Add the ground herbs and stir continuously until the herbs are fragrant and combined with oil and the onions; about 45 seconds to 1 minute.
6. Add the garlic and stir till fragrant; about 30 seconds.
7. Add all 4 cans of tomato sauce and let simmer on medium low for 45 minutes.
8. Taste and add more salt if needed.
9. Serve over spaghetti noodles or your favorite pasta and sprinkle some freshly grated Parmesan Cheese over the top.
Sunday, June 26, 2011
Spinach and Herb Mix
This dip mix is my version of Tastefully Simple's Spinach and Herb Mix. I think I nailed it and now I don't need to spend 9$ on a bottle of spices. What a great way to get spinach into your kids!
1/3 C dried spinach-dry on the counter or in a dehydrator. 1 bunch should yield the dried amount needed for this recipe.
2 T dried onion
1 T + 1tsp dried dill
1 tsp ground garlic
Mix together and store in a jar.
For yummy dip add:
2 T Spinach and Herb Mix
1/2 C real mayonnaise-don’t substitute
1/2 C sour cream or plain yogurt
Mix together and chill till ready to use.
For Chicken or Fish:
Coat meat with a little olive oil. Sprinkle with salt and pepper.
Coat with Spinach and Herb mix and let marinate for 30 mins. Grill or bake.
Herbed Roasted Chicken:
Add 1 T Spinach and Herb Mix to 2 T butter.
Separate chicken skin from meat but don’t remove. Rub butter mixture under chicken skin to coat. Then rub remaining butter on top of chicken. Salt and Pepper chicken.
Bake chicken in roaster, covered until done about 45 mins. at 350 degrees. Remove cover to crisp skin if desired the last 15 minutes.
Wednesday, June 15, 2011
Holy Crap!
I can't remember the reason why I decided to prepare two completely separate dinners that night, but I was having one of those "I am woman" moments and decided it was doable. Alan and the boys were out picking up the flags from the latest patriotic holiday the scouts are required to post flags for, and Sarah was playing outside with her friends. I was in the zone. Chopping and cooking, sauteing and steaming. I don't remember even remotely what I was making. I suppose the trauma blocked all of that. All I remember is my favorite knife for chopping onions was dirty. So, rather than wash it, I pulled out the giant chef's knife I rarely use and went at the onion with chef like speed. Julia Child would have been thrilled to see me fly through that onion. I have been practicing and am developing a feel for the rhythm.
I was so into the chopping, I failed to notice exactly what I had chopped that evening until I began scooping up the onions for the pot and noticed clearly, the tip of my finger laying on the cutting board! I am sorry, I know that is graphic, but there it was. Plain as day and mocking me for my chopping arrogance. The blood came quickly after my brain realized what my knife had done to my finger.
I have cut my fingers before and it has hurt, but this was epic! My middle finger had a distinctive flat side where the tip use to be. I had the presence of mind to remove the non-onion part of my recipe and grabbed a paper towel and applied pressure. At this point you would have thought I should stop cooking, but I didn't. I continued with my injured hand gripping a paper towel and raised above my head (to slow the bleeding of course) and my other hand continuing to cook. I wasn't going to let all of my hard work go to waste!
Sarah had come in from playing by now and was confused as to why my arm was raised over my head. "What are you doing Mom?", she says. "I cut myself, again." The immediate look of recognition washes over her face and she asks me if I need help. A sous chef! Yes, I needed help. Sarah was a champ and helped me finish cooking dinner. The bleeding of course didn't improve with my first aid efforts and I started to get worried I had really done serious damage this time. There are several nurses on my street and I wondered which of them I could call to assist me.
The embarrassment because of my stupidity took priority over my gushing finger and I refused to call anyone, let alone go to the urgent care. I know how to handle this. Cayenne Pepper stops bleeding! I begin to search for the Cayenne and can't find it anywhere. My plan is foiled. How can I be out of the giant Costco container I have had for years! I am going to have to tell someone about this. I can't leave my dinner to go to the store because it isn't quite finished. And, the bloody stump at the end of my arm might alarm the Walmart people. I can't leave Sarah in charge of finishing dinner; she's eight. I have to call Alan and confess to him what I did. Telling Alan about my injuries is worse than getting sent to the principals office. He has has too many calls from friends about me at the emergency room. He never knows what is around the corner with me. Or, how much it may cost us.
So, after a very matter of fact phone call assuring him it is nothing, Alan arrives home with a container of Cayenne Pepper. The bleeding has been steady for about 30 minutes so I was getting desperate for it to stop. After pouring the pepper into a small bowl, I dunk my finger into the without even thinking. The tip of the human finger has some pretty powerful nerve endings. When they are exposed just to air it is painful. When Cayenne Pepper is applied to the exposed nerve endings... insert expletive here. I have experienced all different kinds of pain and this ranks second after my kidney stone with child birth a distant third.
My heart rate exploded and I had to leave the presence of my family. The pain knocked the breath right out of my lungs. Crying seemed appropriate, but the only noise that escaped my body was something like the yelp dogs make when you accidentally step on them. I am pretty sure I was in shock but happily, the weather was still fairly cold outside and it seemed to help with the pain. I proceeded to pace around my house for 20 minutes or more waiting for the pulsating pain to subside. My neighbors have been considering my sanity and I am sure this episode helped them realize I am nuts but committed to my work.
Cayenne Pepper is a miracle. The bleeding stopped immediately and my finger healed up rather quickly. I really am so cheap that I would put myself through all of this rather than pay a doctor. Home remedy's do work, they just require effort. It has been several months and the tip of my finger is still tender. Our bodies are amazing and the layers of skin grew back so I don't have a weird, flat looking fingertip. And, dinner was fantastic!
Thursday, March 3, 2011
Snappy Joes
Sloppy Joes
Ingredients:
1 lb of lean ground beef or turkey-don’t skimp on the meat. Cheap fatty hamburger will give you an inferior outcome. You want the meat very lean.
½ cup chopped red pepper
1 small onion chopped fine-use the food processor
1 8 oz can of tomato sauce
½ cup BBQ sauce of choice-here is my recipe Sweet and Tangy BBQ Sauce
1 cup shredded carrots
6 oz green chili-I use the ones I canned and they are a bit spicier than the ones from the store.
If you don’t have green chili add some tobasco sauce for a little kick.
Brown the meat with the onions first. Add the peppers and the carrots and cook till soft. Add the green chili and cook for a few minutes then mix in the tomato sauce and BBQ sauce. Allow to cook for a few minutes to let the flavors combine. The mixture should be think and round up on a spoon when scooped. If you need to cook it longer and let it reduce then do so.
Serve with hamburger buns or tortillas.
Wednesday, January 12, 2011
Put an End to Cloudy Dishes
I found this post on http://kitchenkneadsinc.blogspot.com Kitchen Kneads is a wonderful store in Ogden, Utah that sells just about everything and anything you could want for cooking and food storage. Thanks to them for the information.
If you think your dishes aren’t getting as clean as they used to, you’re probably right! As of July 1, 2010, all the detergent makers removed phosphates from their detergents. This has caused a rash of washability complaints because the phosphates did a number of important things to help the detergent clean better. 


For example, phosphate causes food to break apart and dissolve by removing the calcium that binds foods together. It also reduces spotting and filming during the wash cycle. Phosphate also helps break up and get rid of grease, helps control water hardness, and suspends soils within the wash water so they are not redistributed onto the plates.
The old-formula dishwasher detergents had about 30% phosphates. Now, with the phosphates removed, the calcium is free to run around inside the dishwasher slurry causing trouble.
But all is not lost. I have the solution. After being plagued with this horrible film that not only made my dishes look terrible, but also made them taste funny (glasses), I got fed up and went on a search for a recipe to make my own dishwasher detergent. I searched and searched and happened upon a recipe that goes as follows:


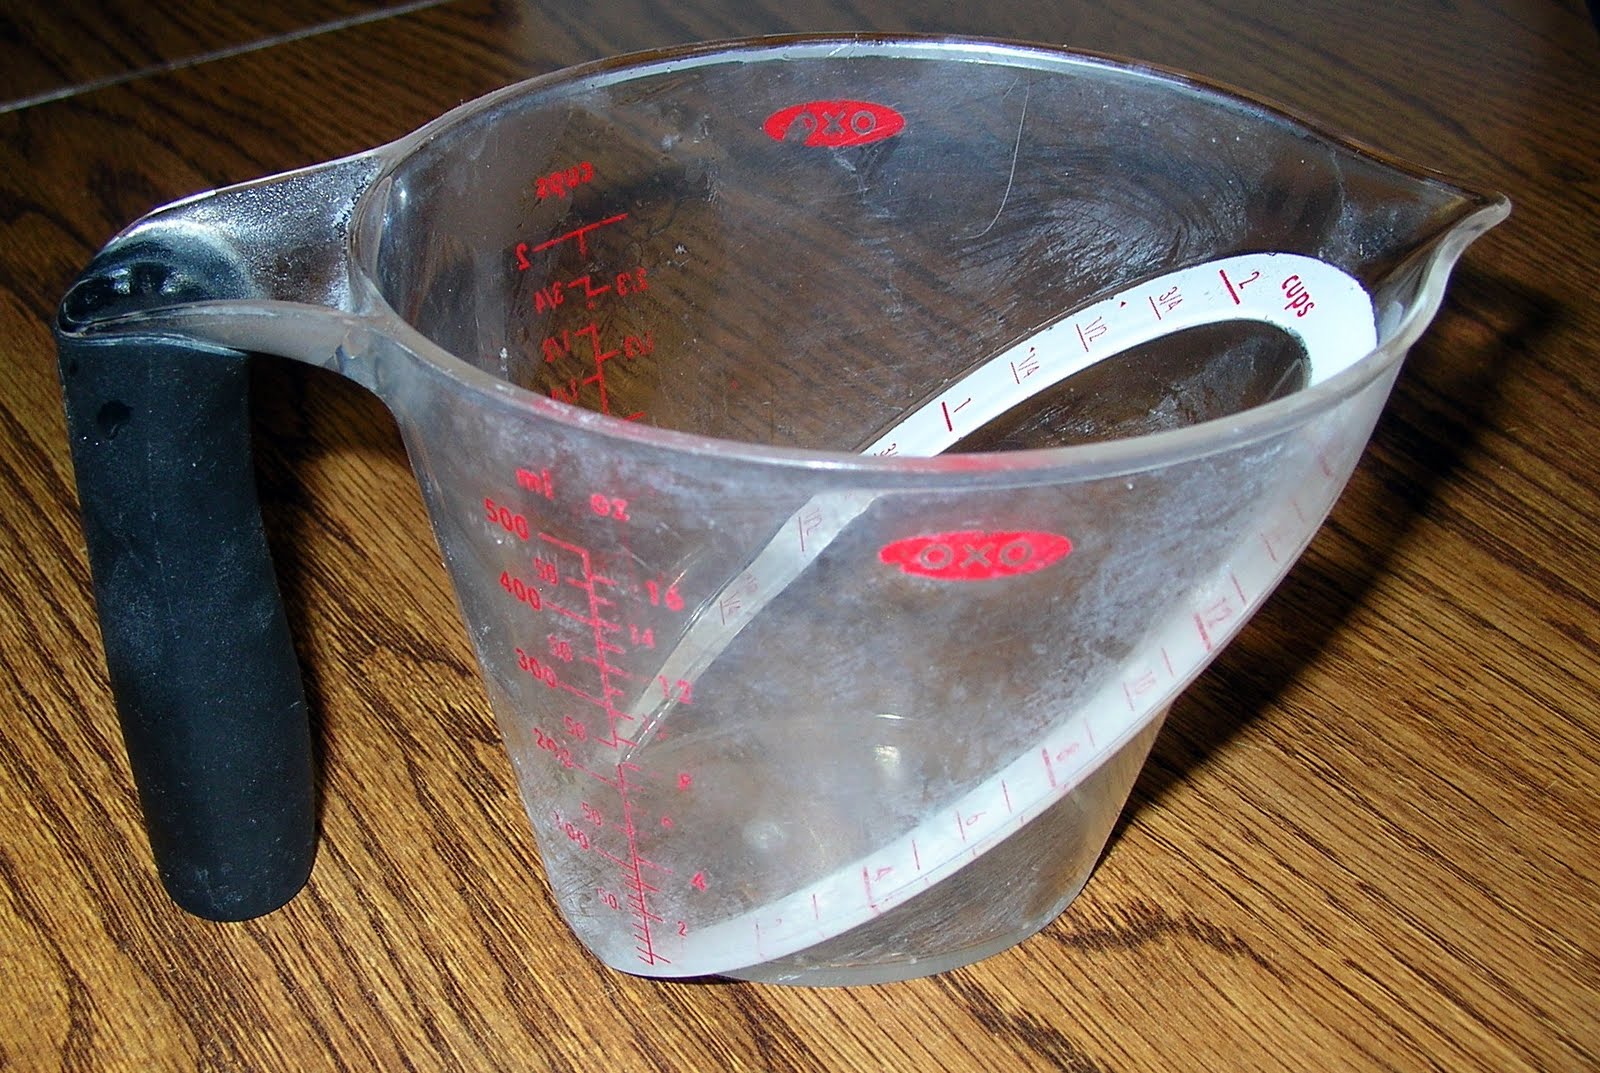
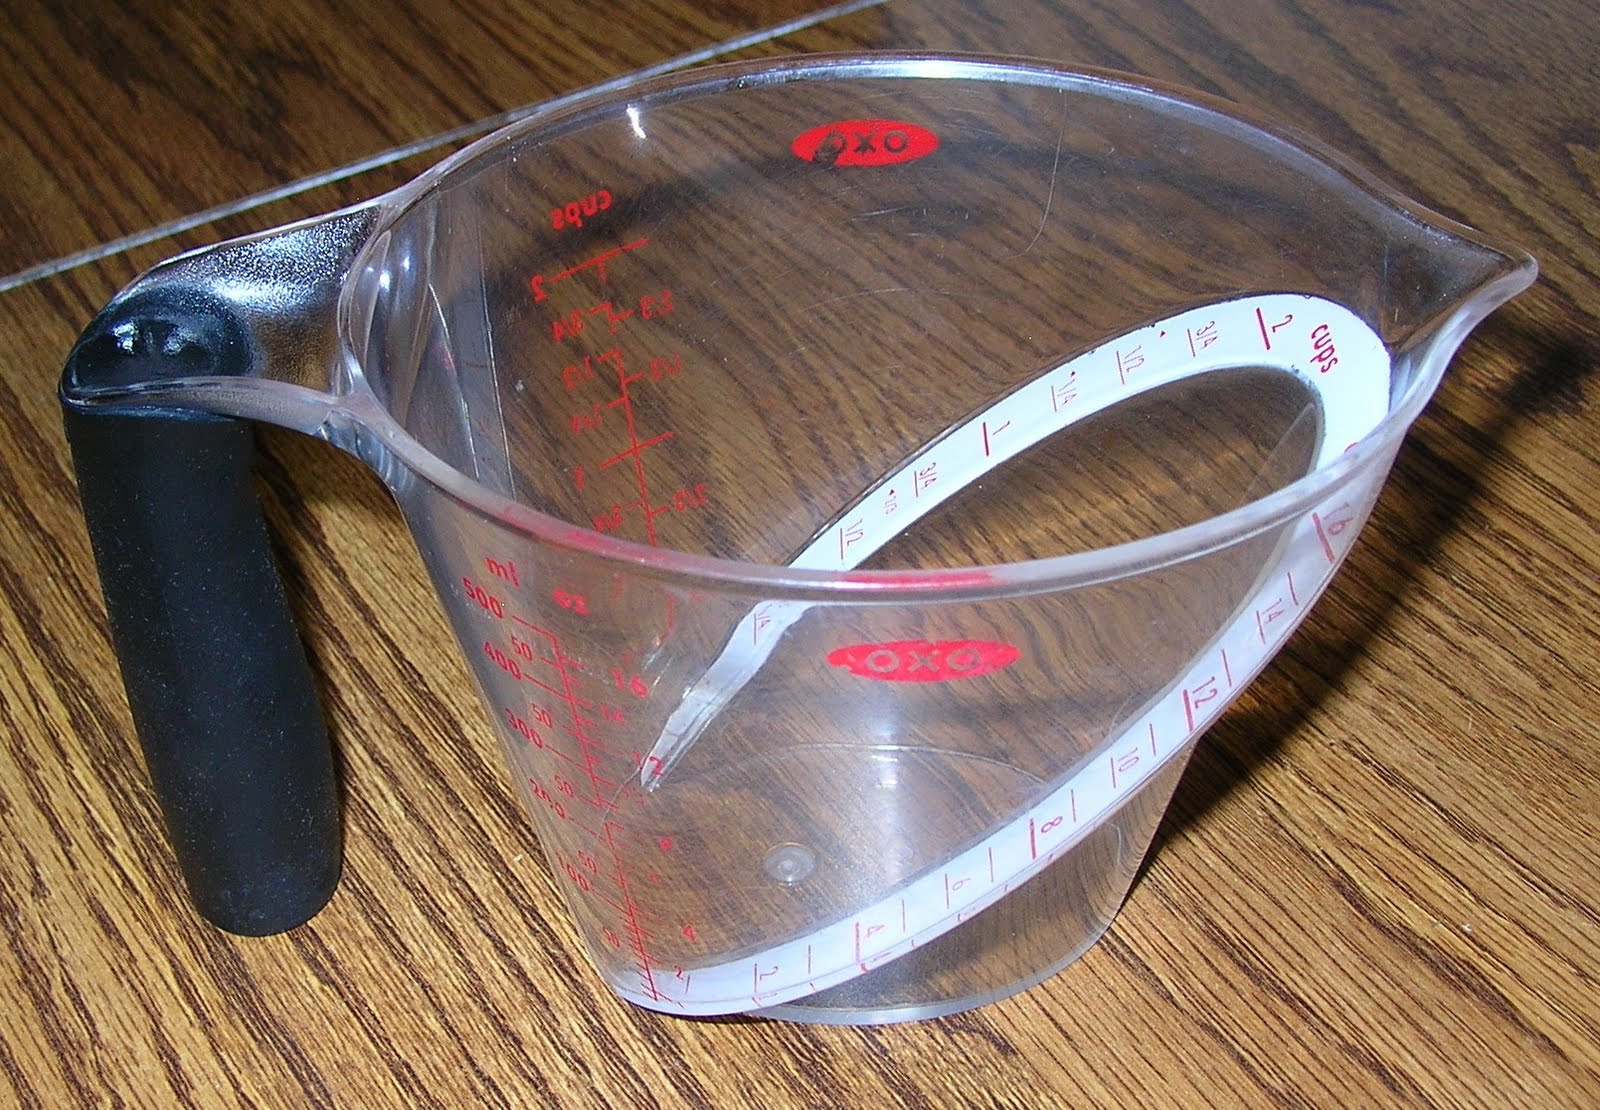
 Not only is this an awesome dishwasher detergent, but it's also tons cheaper. The top 2 photos are what was plaguing me - a horrible white film that wouldn't even scrub off. These last 2 are what happened to the same dishes after washing them with this detergent. Amazing difference, huh?
*Note: You may have to wash your dishes a few times before the white residue is removed.
The old-formula dishwasher detergents had about 30% phosphates. Now, with the phosphates removed, the calcium is free to run around inside the dishwasher slurry causing trouble.
But all is not lost. I have the solution. After being plagued with this horrible film that not only made my dishes look terrible, but also made them taste funny (glasses), I got fed up and went on a search for a recipe to make my own dishwasher detergent. I searched and searched and happened upon a recipe that goes as follows:
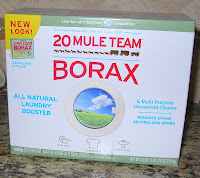
1/2 cup Borax

1/2 cup Washing Soda
(NOT Baking Soda. Washing soda can be found in the laundry aisle of some stores. I found mine at Macey's.)

1/4 cup Citric Acid
(Not as easy to find. The only place I know of to find it is at Kitchen Kneads. And even if I did know where else to find it, I wouldn't say because [come on] this is a Kitchen Kneads blog.) The citric acid is what creates that *sparkle and shine*. It basically does what the phosphates do.

1/4 cup Coarse Kosher Salt
(The salt is your scrubber)

Mix it all up well. Use 1 Tablespoon per load. That's really all you need.
As a rinse agent, forget the Jet Dry and just pour some vinegar in the rinse agent spot. It's awesome!

*Note: You may have to wash your dishes a few times before the white residue is removed.


Thursday, December 2, 2010
Creamy Fettuccine Pomodoro
This is a wonderful way to use your fresh basil and tomatoes from the garden! It is quick and easy and very good for you!
Equipement:
Large skillet with tall sides
Pasta pot and strainer
Ingredients:
2 T garlic minced
1/2 cup minced red onion
1/4 C fresh basil-chopped or ribboned
4 roma tomatoes-or fresh tomatoes you have-diced
2 T High quality balsamic vinegar
1 8 oz can of tomato sauce
1/2 cup white wine or chicken stock
1/2 cup heavy cream
pinch of red pepper flakes
salt and pepper to taste
2 T olive oil for sauteing
8 oz fettuccine cooked
While you are cooking the sauce- drop the pasta in boiling water and let cook till al dente.
Prep all of your ingredients so you can add them quickly when needed.
Saute onions on low medium heat until they are clear and soft. Add salt and pepper to flavor
Add garlic and toss in pan for 1 minute until it becomes fragrant.
Add red pepper flakes.
Add chopped tomatoes and saute for another 2-3 minutes until they are soft and cooked.
Add 3 T of the basil and 1 T balsamic vinegar and let reduce for about 5 minutes.
De-glaze the skillet with the white wine or chicken stock and cook for another 2-3 minutes.
Once the alcohol has cooked off add the remaining 1 T of the balsamic vinegar and the tomato sauce. Cook for 3-4 minutes to impart flavors to the tomato sauce.
Then add the heavy cream and cook until all the flavors are combined then turn off the heat.
Add the cooked pasta to the sauce and toss to coat the pasta. Add 1/4 cup of pasta water to the sauce if needed to keep the pasta from drying out the sauce.
Sprinkle with remaining basil and fresh Parmesan cheese.
Enjoy!
Monday, November 15, 2010
Appliance Whore
I have recently learned something very important about myself. I am an appliance and kitchen gadget whore. I am not ashamed to admit it but it may surprise you how much I really love kitchen accoutrements. Every year when the holidays roll around we all take time to reflect on what we may enjoy receiving on Christmas morning. My father sent me a funny commercial which highlights the consequences of poor gift giving by husbands. A husband dared to give his wife a top of the line vacuum for their anniversary. The horror! She put him in the dog house where he was forced to fold laundry for an eternity unless a panel of wives could be convinced he should be paroled. All I could think of while watching this humorous clip was how much I would love to have my husband give me the top of the line vacuum for a Christmas gift.
My dear husband in an effort to be thoughtful and loving, gave me a gift certificate for a day at a spa several years ago. Massage, facial, manicure, pedicure; the works. I was touched he would give me such a thoughtful gift but that gift certificate sat on my desk for almost a year before I cashed it in. I know, you think I am crazy. I just couldn't do it. I really don't like people I don't know touching my and the thought of being sanded and tenderized just isn't appealing at all. Not to mention that fact that I would need to be hypnotized to overcome my germophobia ifor the pedicure foot bath. Eeewww! It just sounds so yucky. Whose feet have been in there before me and what weird skin disorder could I potentially catch? Was it cleaned really, really, really well? The spa just isn't for me.
On the other hand, I can drop some serious cash in a Kitchen or appliance store. To this day, the most thoughtful gift my husband gave me for Christmas was the Viking Food Processor and matching Blender. I was completely surprised and I still get a thrill from using them. My latest acquisitions include a balloon whisk, a very large wooden spoon, a huge ceramic bowl-I really love it!- and the mother of all roasting pots. A Le Creuset Oval Roaster in Red. It is beautiful and I have been carefully considering which recipe I will use to christen this amazing kitchen tool. I even got it for 1/2 price which makes it all the better. It sits in the center of my kitchen table so I can admire it while I consider where its home will be.
I realized tonight I would rather have a Food Saver than a diamond ring. I rarely wear the one I've got because I generally have hands that are covered in something wonderful (I wash the wonderful off them immediately of course). I would rather have a 6 burner, gas Viking stove with a double oven than a new car. They cost about the same. I would be in Heaven if I could get my hands on a stainless steel, 24 cup commercial muffin tin.
For one of my anniversaries my husband gave me a diamond anniversary ring. I loved the ring but secretly I thought I was getting a new washing machine. I was momentarily disappointed. He has since learned my compulsion for kitchen tools and that is why for my 20th wedding anniversary, I am patiently waiting for my Cuisinart 14 inch wok skillet to arrive in the mail. We special ordered it of course for the free shipping and got it on sale!
Saturday, October 30, 2010
How to properly dry your fresh herbs
Growing your own fresh herbs is a wonderful way to save money. But, we always end up with more than we will need for any one recipe. Drying your herbs is a great way to use all of your herb harvest and not waste your gardening efforts.
This process is for flat leaf or curly parsley, or cilantro. Cilantro can be dried but doesn't retain its bite. If you have a lot of cilantro and don't want to have to throw it out then I would dry it. Coriander seeds are what the cilantro leaf comes from. Ground coriander seeds are a wonderful spice to have in your repertoire for your favorite Mexican dishes rather than dried cilantro.

Pull the leaves off the stems and mince them well.

Put the minced leaves in a fine mesh strainer and run under water for 30 seconds until the water runs clear and no longer is green. This process washes the chlorophyll off the leaves. If you don't do this step, the leaves will turn brown and the flavor of the herb is bland and can even be bitter.

Spread the washed leaves onto a baking sheet lined with parchment paper. Don't use paper towels because the herbs dry into the paper towels and it makes it difficult to get them off in the end.

Set the herbs out to dry for a few days and viola, freshly dried herbs! Store in a jar with a lid or in a plastic bag.
1. Oregano can be left on the stems to dry. Place stems on a parchment lined baking sheet and set out to dry. Once the leaves are dry, Pull them off to store.
2. Rosemary should be removed from the stem before drying. Just pull the leaves off in the opposite direction from how they grow and place them on a parchment lined baking sheet to dry.
3. Basil can be dried by removing the leaves from the stems and laying them out on a parchment lined baking sheet. This is also true for spinach.
4. Thyme can be dried on the stem on a parchment lined baking sheet. Remove the leaves once they are dry.
*All of these herbs can be dried in a dehydrator. The heat should not exeed 100 degrees and the drying time will take about 24 hours for the large leaves and rosemary. The smaller leaves and chopped parsley will dry quicker.
Homemade Yogurt-finally!
Yogurt:
Making yogurt is a very simple process and you have a very versatile medium with which to create many other basic ingredients for cooking.
Yogurt requires three things to culture. A heat source, time, and basic ingredients. Yogurt can be made from raw milk if you have a source. Most of us don’t and I have found using powdered milk from the cannery a great way to rotate my stored inventory without having to drink it all.
Equipment:
Cast Iron Dutch Oven (porcelain coated or uncoated) or other good quality heat conductive pot with a lid.
Heating Pad, or **#10 can yogurt maker, or commercial yogurt maker.
½ pint glass jars with lids
Large bowl with pouring spout-large 8 cup measuring bowls work great.
Whisk
Ingredients:
4 Cups water
2 Cups Non-instant Powdered Milk-it has to be non-instant or it won’t work
4 T unflavored plain yogurt to use as a start
Optional-high quality pro-biotic to add to yogurt if you don’t have a start
This makes 48oz of yogurt.
Procedure:
Prepare pot by filling it with about 5 cups hot water and placing it on the #10 can maker with the lid on. The yogurt should be introduced into a warm environment so the temperature can be maintained from mixing to production.
1. Measure out the warm water – at least 100 degrees F- into the bowl. Be careful of the temperature. If you go over 110 degrees you will kill the start and the yogurt won't set.
2. Add the powdered milk and whisk until completely combined.
3. Add the yogurt start and whisk in completely. If you don’t have a yogurt start, use one capsule for each T you are short (break it open and pour the contents into milk mixture; throw out the capsule). Also, you can use just the pro-biotic if you don’t have any yogurt.
4. Make sure you mix well and there are no lumps.
5. Pour milk mixture into clean jars.
6. Place jars into pot with water and add more water if needed to bring the level up to the neck of the jars. Don't put lids on the jars. Check the temperature of the water. You want it to register between 110-120 degrees. If the pot is heating the water hotter, use a lower wattage light bulb.
7. Put the lid on the pot and let it sit for 12-14 hours. If you want yogurt that is more watery like what you buy at the store, then check it sooner than 12 hours.
*The longer you let it sit, the creamier the yogurt will be and the less water will come off it. You can let it go for about 16 hours before you should put it into the fridge. If you forget about it and let it go longer, it will get weird.
8. After you have decided how long to let the yogurt culture, remove the jars from the pot and place lids on them. Then put them into the fridge to set for at least 2 hours.
9. Once the yogurt has set, you can use the yogurt in many different ways.
10. The longer you leave it in the fridge, the more pronounced the flavor becomes.
**To make your own yogurt maker at home all you need is a light socket and a #10 can. These are the really large cans like big coffee cans or the huge cans Costco sells. Simply punch a hole in center of the bottom of the can and install a light socket inside the can. Put a 60 watt bulb in it and you are good to go. Depending on the heat conductivity of the pot you use, you may need to play with the wattage on the bulb. I started at 25 watts and ended up with the 60 working with my pot.
When you are ready to make your yogurt, plug it in and place the dutch oven on top of the can with warm water in it and the lid on. After mixing and pouring your yogurt mixture into the jars, place them in the pot and walk away. It is that easy!
When you are ready to make your yogurt, plug it in and place the dutch oven on top of the can with warm water in it and the lid on. After mixing and pouring your yogurt mixture into the jars, place them in the pot and walk away. It is that easy!
Using Homemade Yogurt
Cream Cheese:
1. To make cream cheese, simply take one jar of yogurt and scoop it into a double ply piece of cheesecloth.
Pull up the edges of the cheesecloth in a bundle and tie them with some kitchen string. Leave a loop in the string and slip it over the handle of a wooden spoon.
Place the hanging yogurt bundle over a large water pitcher and let it sit over night.
The water from the yogurt will drain off and the remaining product will be nonfat cream cheese!
Use the cream cheese in recipes just like if you bought some at the store.
Don’t throw out the water that has drained off. It is called whey and can be used in recipes too!
2. I recently discovered another way to make the cream cheese. You simply use 1 Cup powdered non instant milk, 1 cup whole milk, and 1 cup heavy cream. Add the 2 TB yogurt starter and put in the jars like the yogurt. Let sit in the yogurt maker with water up to the neck of the jars for 12-16 hours and it will make creamy, yummy cream cheese. This version has all the fat so if you are looking for a low or no fat option do method 1.
2. I recently discovered another way to make the cream cheese. You simply use 1 Cup powdered non instant milk, 1 cup whole milk, and 1 cup heavy cream. Add the 2 TB yogurt starter and put in the jars like the yogurt. Let sit in the yogurt maker with water up to the neck of the jars for 12-16 hours and it will make creamy, yummy cream cheese. This version has all the fat so if you are looking for a low or no fat option do method 1.
Buttermilk:
Buttermilk is made using 1 part yogurt to one part water. You can also add the whey from the cream cheese as part of the water. Make buttermilk as you need it or mix a bunch up and just leave it in the fridge. The longer you let it sit in the fridge, the more pronounced the flavor becomes.
Sour Cream:
Sour Cream can be achieved by leaving the yogurt in the fridge for a week or more. The longer you let it sit the more it will take on a sour cream flavor. It can be used in any recipe you would use sour cream.
Creme Fraiche
This is the French version of sour cream and it is wonderful! You take 1 part yogurt and mix it in with 2 parts heavy cream. Put it in a jar with a lid and place it in the pantry or cabinet over night-12 hours. In the morning put it in the fridge. You will have this creamy wonderful sour cream mixture to use in all kinds of things with amazing pro-biotic cultures from the yogurt! It isn't as thick as the yogurt you would achieve just letting the yogurt sit, but it is amazing.
Subscribe to:
Posts (Atom)